Who fixes house heater roof vents? It’s a question many homeowners ask when they notice their heating system isn’t working as efficiently as it should. Roof vents play a crucial role in regulating your home’s temperature and airflow, and when they malfunction, it can lead to uncomfortable drafts, high heating bills, and even potential safety hazards.
Understanding the common problems associated with roof vents, identifying the source of the issue, and determining the appropriate repair approach are essential steps to restoring your home’s comfort and efficiency.
From simple cleaning and sealing to more complex replacements, understanding the scope of repair and whether DIY or professional help is needed is crucial. This guide will equip you with the knowledge and resources to make informed decisions about your roof vent repairs, ensuring a comfortable and energy-efficient home.
Understanding the Issue: Who Fixes House Heater Roof Vent

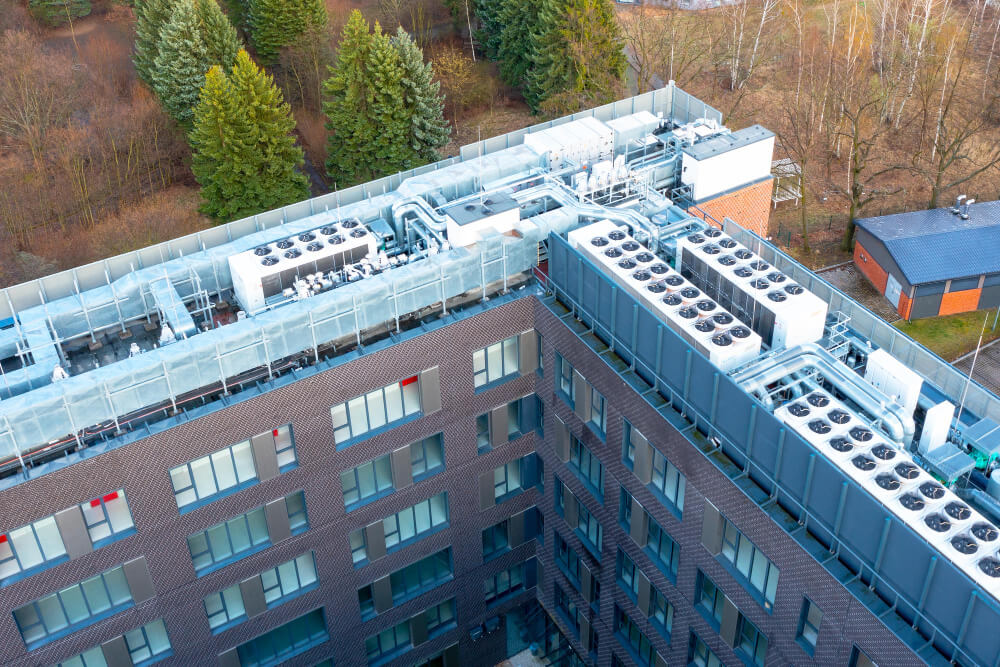
Roof vents play a crucial role in ensuring the efficient operation of a house heating system. They act as an exhaust system, removing hot, humid air from the living space and allowing fresh, cool air to enter, thus maintaining proper air circulation and preventing moisture buildup.
Common Roof Vent Problems and Their Impact on Heating Efficiency
Roof vents can experience various problems that can significantly affect the performance of your heating system. These issues can lead to reduced heating efficiency, increased energy consumption, and even damage to your HVAC equipment.
Causes and Effects of Common Roof Vent Problems
- Obstruction:Accumulated debris like leaves, twigs, or bird nests can block the vent opening, hindering airflow and reducing the efficiency of the heating system. This can lead to poor air circulation, uneven heating, and higher energy bills.
- Damaged Vent:Physical damage to the vent, such as cracks, holes, or a loose cap, can allow air to escape and reduce the effectiveness of the heating system. This can lead to drafts, cold spots in the house, and increased heating costs.
- Improper Installation:Incorrectly installed vents can cause improper airflow, leading to inefficient heating, moisture buildup, and potential damage to the HVAC system.
- Inadequate Ventilation:Insufficient ventilation can cause moisture to build up in the attic, leading to mold growth and potential structural damage.
Identifying Roof Vent Issues
Recognizing the symptoms of a roof vent problem is crucial for addressing it promptly and preventing further complications.
Common Signs of a Roof Vent Issue
- Unusual Noises:A whistling or rattling sound coming from the vent area can indicate a blockage or a loose vent cap.
- Cold Drafts:Feeling cold air coming from the vent or near the attic hatch could indicate a leak in the vent or improper insulation.
- High Heating Bills:If your heating bills are significantly higher than usual, it could be a sign of a malfunctioning roof vent, as it might be causing your heating system to work harder.
- Moisture Buildup:Signs of condensation, mold growth, or water damage in the attic can indicate inadequate ventilation and a possible roof vent problem.
Identifying the Problem
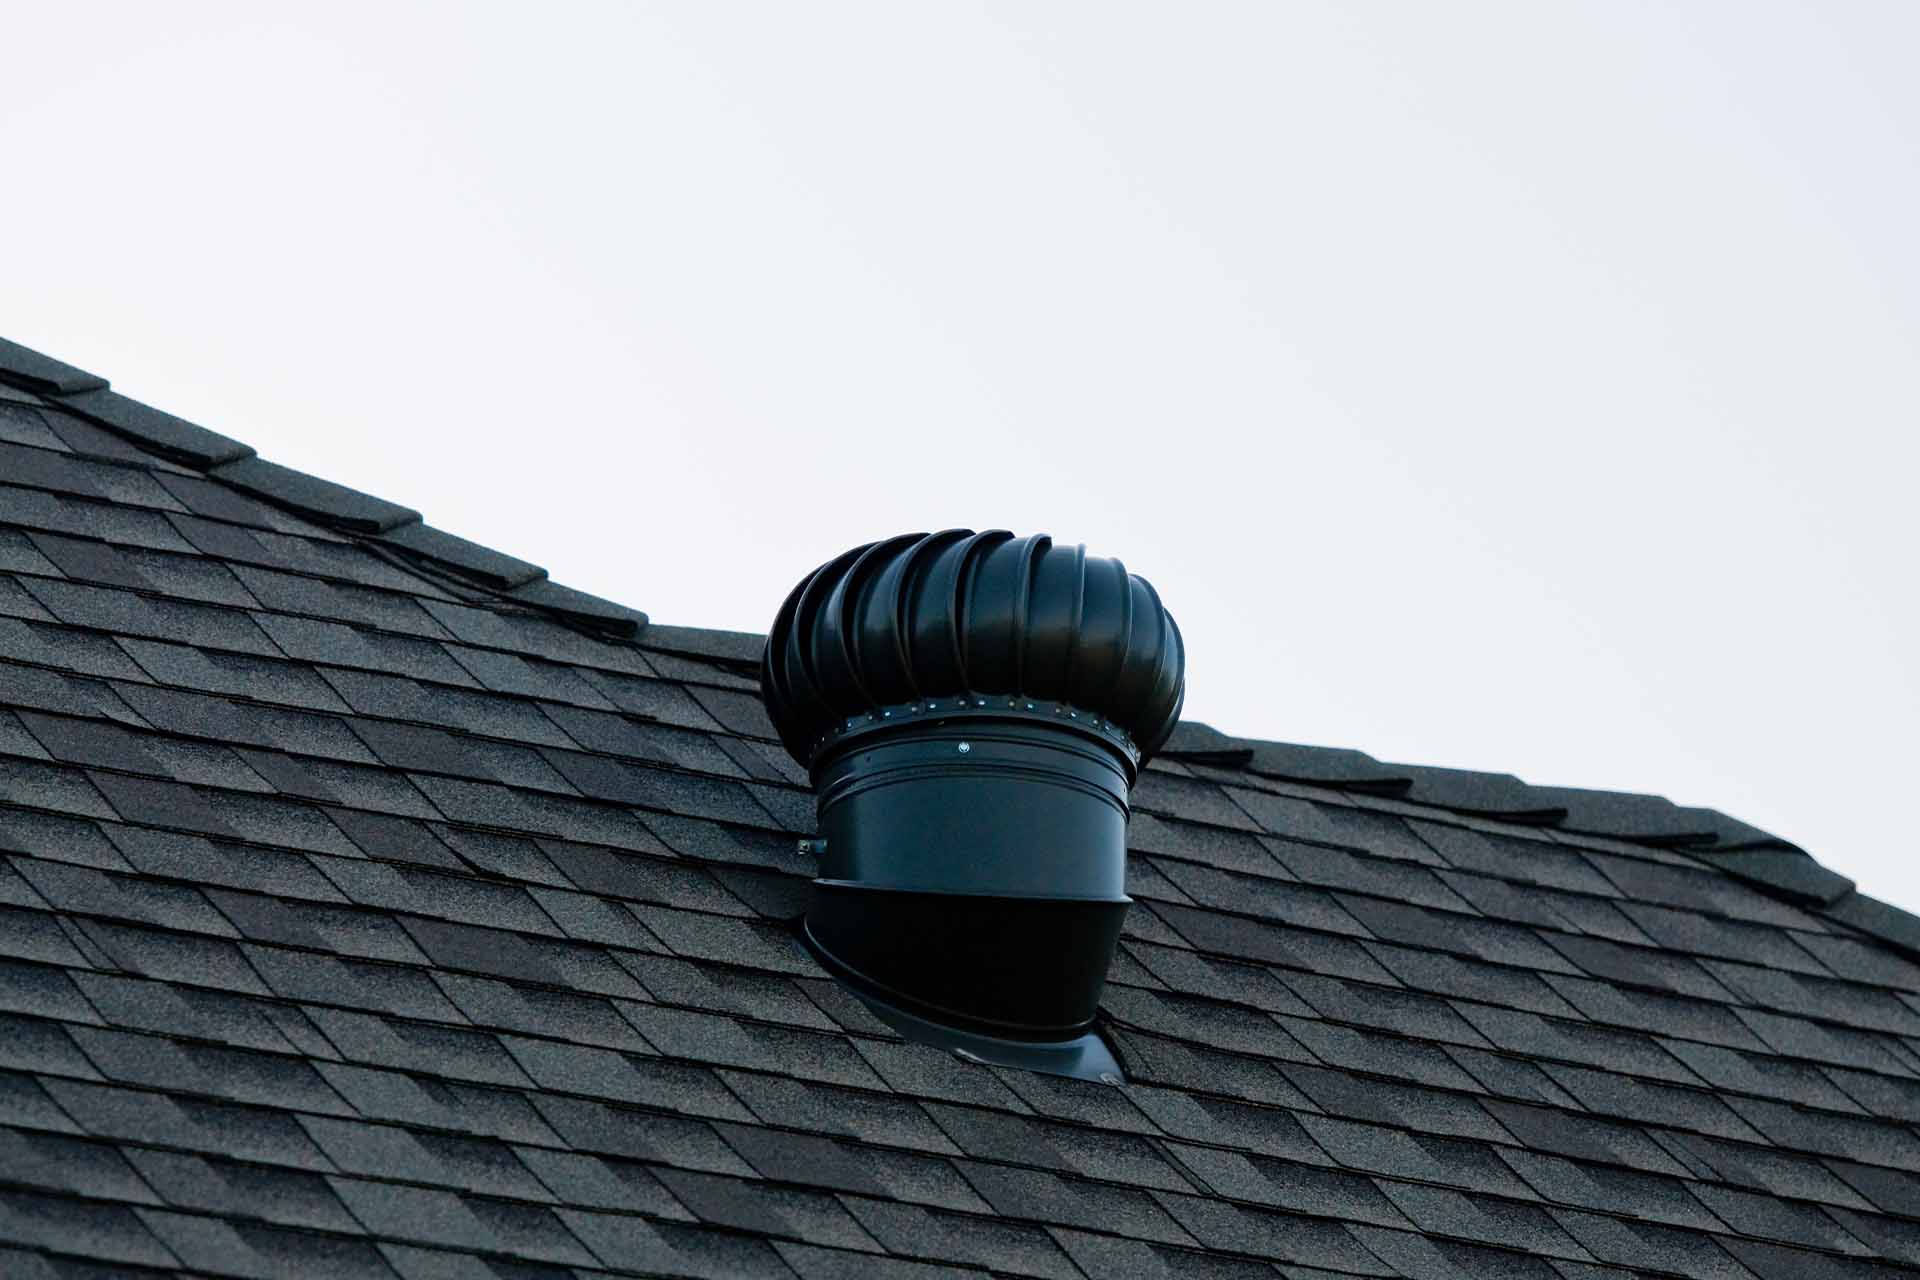
Understanding the different types of roof vents used in house heating systems is crucial for identifying potential issues. Each type plays a unique role in the efficient operation of the heating system, and malfunctions in any of them can lead to decreased heating performance, increased energy consumption, and even safety hazards.
Types of Roof Vents
Different types of roof vents are employed in house heating systems, each with specific functions and designs.
- Power Vents:These vents use a fan to exhaust warm air from the house, ensuring proper ventilation and preventing the buildup of moisture and pollutants. They are commonly used in bathrooms, kitchens, and laundry rooms.
- Gravity Vents:These vents rely on natural convection to exhaust air. Warm air rises and exits through the vent, while cooler air is drawn in from the house. They are typically used in attics and crawl spaces.
- Combination Vents:These vents combine both power and gravity ventilation. They have a fan that operates when needed, and a gravity vent that provides backup ventilation.
- Solar Vents:These vents use solar energy to power a fan that exhausts air. They are an energy-efficient option, particularly for areas with abundant sunshine.
Causes of Roof Vent Malfunctions
A malfunctioning roof vent can significantly impact the performance of a heating system. Some common causes of malfunctions include:
- Blockage:Debris such as leaves, twigs, or bird nests can accumulate in the vent, obstructing airflow and reducing ventilation effectiveness.
- Damage:Physical damage to the vent, such as cracks, holes, or loose connections, can compromise its structural integrity and hinder proper ventilation.
- Improper Installation:Incorrect installation, including improper sizing, positioning, or sealing, can lead to airflow problems and reduced ventilation efficiency.
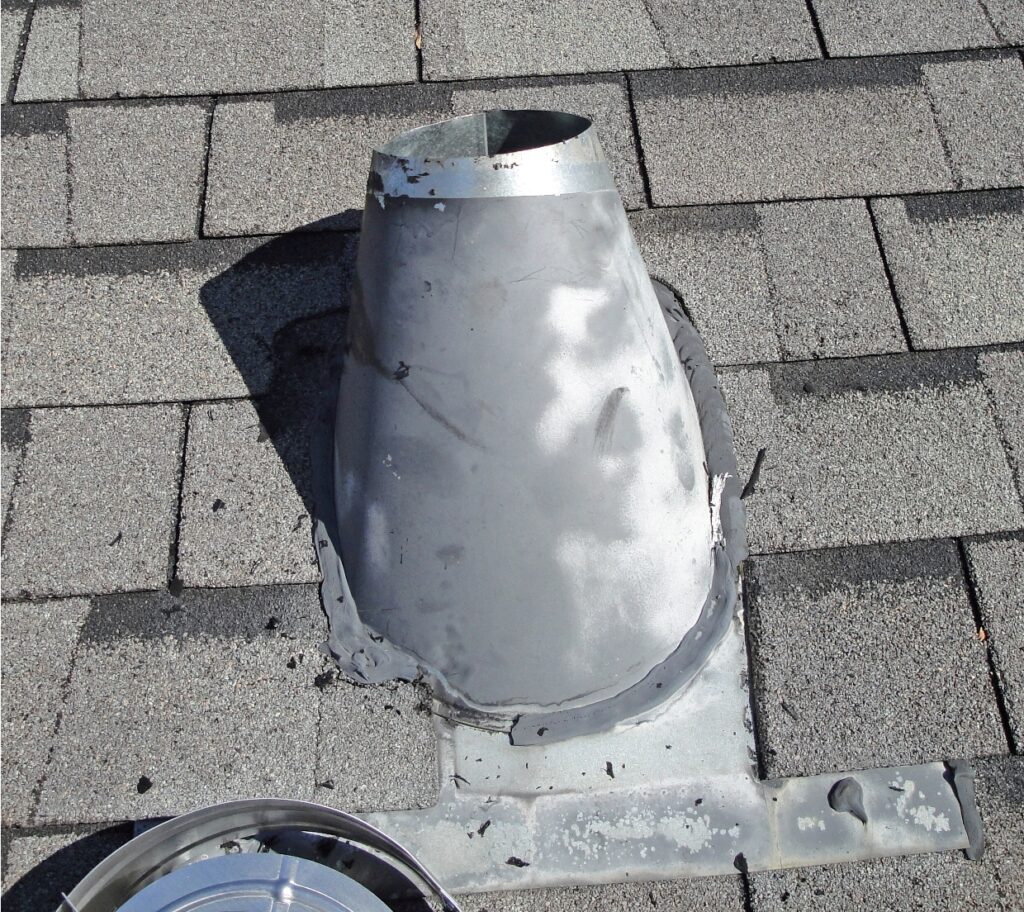
Visual Inspection of a Roof Vent
A thorough visual inspection of the roof vent can help identify potential problems. Follow these steps:
- Access the Roof Vent:Safely access the roof vent, ensuring a stable footing and proper safety precautions.
- Inspect for Blockage:Carefully examine the vent for any debris or obstructions. Remove any visible blockages.
- Check for Damage:Inspect the vent for cracks, holes, or loose connections. Any signs of damage should be addressed promptly.
- Verify Proper Installation:Ensure the vent is properly sized, positioned, and sealed. Any installation issues should be rectified.
- Test Ventilation:If the vent is equipped with a fan, test its functionality by turning it on and verifying proper airflow.
3. Determining the Scope of Repair
Understanding the extent of the necessary repairs for a roof vent is crucial for both homeowners and contractors. Accurately assessing the scope of work allows for a more precise cost estimation, efficient planning, and informed decision-making regarding the repair strategy.
This section delves into the differences between minor repairs and major replacements, explores the factors influencing repair complexity, and provides a comprehensive overview of common roof vent repair tasks.
3.1. Understanding the Difference
Minor repairs typically address localized issues, focusing on restoring the vent’s functionality without replacing major components. Major replacements, on the other hand, involve replacing the entire vent unit or significant portions due to extensive damage or obsolescence.
Nature of the Issue
Minor repairs typically address issues like minor cracks, leaks, or obstructions that can be easily addressed with sealing, cleaning, or replacing small parts. Major replacements are usually necessary for extensive damage like significant rust, complete detachment, or structural failure of the vent.
Scope of Work
Minor repairs typically involve tasks such as cleaning, sealing, or replacing individual components like louvers, screens, or small parts. Major replacements involve removing the entire vent unit, replacing it with a new one, and securing it to the roof.
Cost
Minor repairs are generally more cost-effective, ranging from a few hundred dollars to a thousand dollars, depending on the complexity of the repair. Major replacements can cost significantly more, ranging from a thousand dollars to several thousand dollars, depending on the vent type, size, and materials.
3.2. Factors Influencing Repair Complexity
Several factors influence the complexity of a roof vent repair, impacting the time, effort, and cost involved.
Type of Vent
The type of vent can significantly impact the repair complexity. Turbine vents, with their rotating components, may require more specialized knowledge and tools for repair compared to static vents. Solar vents, with their integrated solar panels and electronic components, might require specialized expertise for troubleshooting and repair.
Extent of Damage
The severity of damage plays a crucial role in determining the repair complexity. Minor cracks or leaks can be addressed with simple sealing, while significant rust or complete detachment might necessitate extensive repairs or even a full replacement.
Accessibility
The accessibility of the vent also affects the repair complexity. Vents easily accessible from the attic or roof can be repaired with minimal effort. However, vents located in hard-to-reach areas might require scaffolding, specialized equipment, and additional labor, increasing the repair complexity and cost.
3.3. Common Repair Tasks
Common roof vent repair tasks include:
| Task | Description | Impact on Repair Scope |
|---|---|---|
| Cleaning | Removing debris and obstructions from the vent | Minor, often part of a larger repair |
| Sealing | Repairing cracks, leaks, or gaps in the vent | Can be minor or major depending on the extent of damage |
| Replacing Components | Replacing damaged or worn-out parts (e.g., louvers, screens, motor) | Can range from minor to major depending on the part replaced |
| Reinstallation | Securing the vent back to the roof after repairs | Minor, often part of a larger repair |
4. DIY vs. Professional Help
Roof vent repairs can be tackled yourself or entrusted to a professional. Deciding which path to take involves weighing the pros and cons of each option. This section will explore the advantages and disadvantages of DIY versus professional help, helping you make an informed decision.
DIY vs. Professional Help: Pros and Cons
Choosing between DIY and professional help for roof vent repairs depends on factors like your skill level, time constraints, and budget. The table below compares the advantages and disadvantages of each option:
| Factor | DIY | Professional |
|---|---|---|
| Cost | Potentially lower, depending on the repair | Higher due to labor and expertise |
| Time | May take longer due to learning and troubleshooting | Faster, as professionals are experienced |
| Skill Level | Requires basic DIY skills and knowledge of roof vent systems | No specific skills required, as professionals handle everything |
| Safety | Potential risks involved in working at heights | Safer, as professionals are trained and equipped |
| Warranty | No warranty on DIY work | Warranty provided by the professional |
Safety Precautions for Roof Vent Repairs
Working on a roof vent can be hazardous, so taking safety precautions is paramount. Here’s a list of safety measures to ensure your well-being:
- Use a Sturdy Ladder:Always use a ladder that is rated for the weight you’ll be carrying and the height you’ll be working at. Ensure the ladder is placed on a stable surface and secured to prevent slippage.
- Secure Tools:Before climbing the ladder, gather all necessary tools and secure them to prevent them from falling. A tool belt or a secure bag is recommended.
- Wear Proper Footwear:Wear sturdy, non-slip shoes with good traction to prevent falls. Avoid wearing loose clothing that could get caught on tools or the roof.
- Use Safety Harness:If working at a significant height, consider using a safety harness connected to a secure anchor point. This will prevent you from falling if you lose your balance.
- Be Aware of Weather Conditions:Do not attempt roof vent repairs during inclement weather, such as rain, snow, or high winds. Wait for favorable conditions to ensure your safety.
- Have a Spotter:If possible, have someone spot you while you’re working on the roof. They can assist with tool retrieval and alert you to potential hazards.
Professional Expertise for Complex Roof Vent Issues
While some basic roof vent repairs can be tackled by homeowners, certain situations necessitate the expertise of a professional. Complex roof vent issues often require specialized knowledge and tools that most homeowners lack.
“It’s always best to err on the side of caution when dealing with roof vent repairs. If you’re unsure about the complexity of the issue, it’s advisable to call a professional.”
Examples of situations that require professional intervention include:
- Structural Damage:If the roof vent is damaged or compromised due to structural issues, a professional can assess the damage and make necessary repairs.
- Complex Ventilation Systems:Modern homes often have intricate ventilation systems. Attempting to repair these systems without proper knowledge can lead to further complications.
- Potential Safety Hazards:If the roof vent is leaking or poses a safety hazard, a professional can address the issue safely and effectively.
5. Finding a Qualified Professional
Finding the right HVAC contractor is crucial for ensuring a successful and safe repair of your roof vent. Choosing a qualified professional with the necessary skills, experience, and certifications will significantly impact the quality and longevity of the repair.
5.1. Checklist for Qualifications
A comprehensive checklist can help you identify qualified HVAC professionals. It’s essential to consider technical expertise, safety practices, and customer service skills.
- HVAC Certifications and Licenses:Look for contractors with industry-recognized certifications, such as those from the North American Technician Excellence (NATE) or the Air Conditioning Contractors of America (ACCA). These certifications demonstrate a high level of technical knowledge and adherence to industry standards.
- Years of Experience:Consider the contractor’s experience in handling similar projects. Years of experience in HVAC repairs and maintenance indicate familiarity with various systems and potential issues.
- Safety Practices:Verify that the contractor is insured and follows all relevant safety regulations. Ask about their safety protocols and procedures to ensure a safe working environment.
- Customer Service Skills:Choose a contractor who communicates clearly, listens attentively to your concerns, and provides prompt responses. Look for positive reviews and testimonials from previous clients.
5.2. Importance of Multiple Quotes
Obtaining multiple quotes from different HVAC contractors is a critical step in the hiring process. This practice allows you to compare prices, services, and warranties.
- Price Comparison:Comparing quotes from multiple contractors provides a clear understanding of market prices and helps you identify potential cost savings. You can negotiate prices based on the quotes received and ensure you’re getting a fair deal.
- Service Variation:Different contractors may offer varying services, warranties, and additional benefits. By comparing quotes, you can determine which contractor best suits your specific needs and budget.
- Informed Decision-Making:Comparing quotes empowers you to make an informed decision based on your specific needs and budget. You can choose a contractor who offers the best combination of price, services, and reputation.
5.3. Verifying Credentials and Experience
Verifying the credentials and experience of potential HVAC contractors is essential to ensure their legitimacy and competence.
- License Verification:Contact your state’s licensing board to verify the contractor’s license status. This ensures they meet the minimum requirements for operating legally in your area.
- Certification Verification:Check with organizations like NATE or ACCA to confirm the contractor’s certifications. These certifications indicate their expertise and adherence to industry standards.
- Insurance Verification:Ask the contractor for proof of liability and workers’ compensation insurance. This protects you from potential financial losses in case of accidents or damage during the repair process.
- Online Reputation Check:Review online reviews and testimonials from previous clients on websites like Angie’s List, Yelp, or Google My Business. These reviews can provide valuable insights into the contractor’s professionalism, quality of work, and customer satisfaction.
5.4. Sample Email for Requesting a Quote
Here is a sample email you can use to contact potential HVAC contractors:
Subject: Request for Quote
Roof Vent Repair
Dear [Contractor Name],My name is [Your Name] and I am requesting a quote for the repair of my roof vent. The issue I am experiencing is [briefly describe the problem].I would appreciate it if you could provide a detailed quote outlining the services, materials, and estimated costs for the repair.
I am available for an inspection on [dates and times].Please feel free to contact me at [your phone number] or [your email address] if you have any questions.Thank you for your time and consideration.Sincerely,[Your Name]
Maintenance and Prevention
Regular maintenance of your roof vent is crucial for ensuring optimal heating performance and extending the lifespan of your system. Neglecting this vital component can lead to reduced efficiency, increased energy consumption, and potential safety hazards.
Regular Inspections and Cleaning
Performing routine inspections and cleaning of your roof vent is essential for maintaining its functionality. A consistent schedule helps identify and address potential issues before they escalate into major problems.
- Annual Inspection:Conduct a thorough visual inspection of the vent at least once a year. Check for signs of damage, corrosion, or blockage.
- Seasonal Cleaning:Clean the vent thoroughly before and after each heating season. Remove debris, leaves, and other obstructions that can impede airflow.
- After Major Storms:Inspect the vent after severe weather events, such as heavy storms or high winds. Ensure that the vent is securely attached and undamaged.
Preventative Measures
Implementing preventative measures can significantly reduce the risk of roof vent problems. Proper insulation and ventilation are key factors in maintaining a healthy heating system.
- Insulation:Adequate insulation in your attic and around the vent helps prevent heat loss and condensation.
- Ventilation:Proper ventilation is essential for removing moisture and preventing mold growth. Ensure adequate airflow in your attic and around the vent.
- Regular Roof Maintenance:Maintaining a healthy roof is essential for protecting your vent. Inspect your roof regularly for leaks, damage, or missing shingles.
7. Safety Considerations
Working on a roof, especially when dealing with a roof vent, presents inherent risks. Failing to take necessary precautions can lead to serious injuries, including falls, electrical shock, and exposure to hazardous materials. This section will Artikel crucial safety considerations to prioritize when working on a roof vent.
Roof Vent Safety Precautions
Before starting any work on a roof vent, it is essential to understand the potential hazards and implement appropriate safety measures. The following table provides a comprehensive overview of common hazards and recommended safety precautions:
| Hazard | Description | Safety Precautions |
|---|---|---|
| Falls | Working on a roof is inherently risky due to the height. | Use a safety harness and anchor it to a secure point on the roof. Always have a spotter to assist you. |
| Electrical Shock | Roof vents may be connected to electrical wiring. | Always disconnect power to the vent before working on it. Use a non-conductive ladder and wear insulated gloves. |
| Exposure to Hazardous Materials | Roof vents may contain asbestos or other hazardous materials. | If you suspect the presence of hazardous materials, contact a professional for removal. Wear appropriate protective gear such as a respirator and gloves. |
Additional Safety Considerations
Beyond the table, here are some additional safety considerations to ensure a safe and successful roof vent project:
- Inspect the roof:Before beginning work, thoroughly inspect the roof for any damage or weaknesses. Look for loose shingles, cracked flashing, or areas where the roof may be sagging. Address any issues before proceeding.
- Use proper equipment:Employ a sturdy ladder, appropriate tools, and a reliable safety harness. Ensure the ladder is positioned securely and is the right height for the task. Use tools that are in good working order and appropriate for the job.
- Take breaks:Avoid working for extended periods without breaks to prevent fatigue and reduce the risk of accidents. Fatigue can impair judgment and reaction time, increasing the likelihood of a fall or other injury.
- Weather conditions:Do not work on a roof during inclement weather, such as rain, snow, or strong winds. Wet or slippery surfaces can make it difficult to maintain balance and increase the risk of falling. Strong winds can also make it difficult to control the ladder and tools.
- Professional help:If you are uncomfortable or lack experience with roof work, consult a professional contractor. A qualified professional can safely assess the situation, perform the necessary repairs, and ensure compliance with building codes.
Cost Considerations
The cost of repairing a roof vent for your house heater can vary widely depending on several factors, including the type of vent, the complexity of the repair, and the location of the vent. It is crucial to understand the potential cost range and the factors that influence it to effectively budget for the repair.
Factors Affecting Repair Costs
The cost of repairing a roof vent can be influenced by several factors. Here are some of the key considerations:
- Type of vent:Different types of roof vents, such as round vents, rectangular vents, and combination vents, have varying costs. For instance, a simple round vent may be less expensive to repair than a more complex combination vent.
- Complexity of the repair:A straightforward repair, such as replacing a damaged vent cover, might be less costly than a more complex repair, like replacing a corroded vent pipe or fixing a leak.
- Location of the vent:The accessibility of the vent can impact the cost. Vents located in difficult-to-reach areas, such as on a steep roof or near a chimney, may require additional labor and equipment, leading to higher costs.
- Materials:The cost of materials, such as vent covers, flashing, and sealant, can vary depending on the quality and type of material used.
- Labor costs:Labor costs for roof vent repairs can vary based on the location, the experience of the contractor, and the time required for the repair.
Typical Cost Range
It is difficult to provide a precise cost range for roof vent repairs, as the cost can vary significantly depending on the factors mentioned above. However, here is a general estimate based on typical repair scenarios:
- Simple repairs:Replacing a damaged vent cover or sealing a minor leak can range from $50 to $200, depending on the materials and labor costs.
- Moderate repairs:Replacing a corroded vent pipe or fixing a more complex leak can cost between $200 and $500.
- Complex repairs:Replacing a complete vent system or addressing significant structural damage can cost upwards of $500, and in some cases, may exceed $1000.
Budgeting for Roof Vent Repairs, Who fixes house heater roof vent
When budgeting for roof vent repairs, it is crucial to consider the following:
- Get multiple quotes:Obtain quotes from at least three different contractors to compare prices and services.
- Factor in unexpected costs:It is always wise to include a contingency fund to cover any unexpected costs that may arise during the repair process.
- Consider long-term costs:While opting for the least expensive option may seem appealing initially, consider the long-term costs. Choosing quality materials and experienced contractors can help prevent future repairs and save money in the long run.
9. Resources and Information
Successfully repairing your roof vent requires a combination of understanding the problem, determining the scope of repair, and utilizing reliable resources. This section delves into valuable online resources and local building codes that can guide you through the process.
When it comes to your home’s heating system, a roof vent is a crucial component. If you’re experiencing issues with your roof vent, it’s best to call a qualified HVAC technician. They have the expertise to diagnose and fix any problems, just like you might need a professional dentist if you’ve got a chipped tooth! For tips on dealing with a chipped tooth at home, check out this helpful resource: how to fix a chipped tooth at home.
But remember, when it comes to your heater’s roof vent, a professional is the best way to ensure everything is working smoothly and safely.
Reputable Online Resources
The internet provides a wealth of information on roof vent repair, but navigating through the vast sea of content can be overwhelming. This section presents a curated list of reputable websites and resources to help you find reliable information.
- This Old House: This iconic home improvement website offers a comprehensive collection of articles, videos, and expert advice on various home improvement topics, including roofing. Their website features a dedicated section on roofing, covering various aspects, including vent repair.
- Bob Vila: Similar to This Old House, Bob Vila offers a wealth of information on home improvement and maintenance.
Their website provides articles and videos on roof vent installation, repair, and maintenance.
- Roofing Contractor Magazine: This website is a valuable resource for homeowners and professionals alike. It features articles, guides, and videos on all aspects of roofing, including vent installation and repair.
- The National Roofing Contractors Association (NRCA): The NRCA is a professional organization dedicated to promoting quality roofing practices. Their website offers resources on various roofing topics, including vent installation and repair.
- Specialized Roofing Websites: Numerous websites are dedicated specifically to roofing. These websites often offer in-depth information on various roofing components, including vents.
Examples include Roofing.org, RoofingCalc.com, and RoofingGuide.com.
Local Building Codes and Regulations
Understanding and adhering to local building codes is crucial for ensuring safe and proper roof vent installation. These codes vary depending on the location and are designed to protect the public from potential hazards associated with improper installation.
- Importance of Local Building Codes: Local building codes establish minimum standards for construction and renovation projects, including roof vent installation. They ensure that vents are properly sized, positioned, and installed to prevent fire hazards, moisture buildup, and other issues.
- Accessing Local Building Codes: Accessing local building codes is usually straightforward.
Most municipalities have websites where their building codes are available online. You can also contact your local building department for assistance.
- Consequences of Ignoring Building Codes: Ignoring local building codes can lead to various consequences. A poorly installed vent can pose a fire hazard, increase the risk of roof damage, and even affect the resale value of your home.
Additionally, violating building codes can result in fines and legal issues.
Common Roof Vent Types
Roof vents are essential components of a well-functioning heating system, as they facilitate the removal of moisture and exhaust gases from the house, ensuring proper ventilation and preventing potential damage. Understanding the different types of roof vents available is crucial for homeowners to make informed decisions regarding their heating system and its maintenance.
Roof Vent Types
The choice of roof vent type depends on factors such as the size of the heating system, the roof’s pitch, and the desired aesthetic appeal. The following table provides a comprehensive comparison of common roof vent types, highlighting their features, advantages, and disadvantages:
| Type | Material | Size | Installation | Cost |
|---|---|---|---|---|
| Power Vent | Metal | Varies depending on the heating system’s capacity | Requires professional installation due to electrical wiring and venting connections | Higher than other vent types |
| Direct Vent | Metal | Varies depending on the heating system’s capacity | Can be installed by homeowners with basic DIY skills | Moderate |
| Wall Vent | Metal | Varies depending on the heating system’s capacity | Can be installed by homeowners with basic DIY skills | Lower than other vent types |
| Roof Vent | Metal | Varies depending on the heating system’s capacity | Requires professional installation due to roof penetration | Moderate |
Power vents are typically used for larger heating systems, as they have a higher capacity for exhaust gases. Direct vent systems are suitable for smaller heating systems and are often preferred for their ease of installation. Wall vents are commonly used for smaller heating systems and can be installed on exterior walls. Roof vents are a popular choice for their discreet appearance and efficient ventilation.
11. Troubleshooting Roof Vent Issues

Proper roof vent function is crucial for maintaining a healthy and comfortable living environment. Roof vents facilitate the removal of moisture, stale air, and heat from the attic and other enclosed spaces, preventing issues like mold growth, structural damage, and energy inefficiency.
When roof vents malfunction, it can lead to various problems, impacting the overall health and performance of your home. This section provides a comprehensive flowchart to guide you through troubleshooting common roof vent problems, helping you identify the issue, assess its severity, and determine the appropriate solution.
Troubleshooting Roof Vent Issues
A well-designed flowchart can be an invaluable tool for systematically addressing roof vent issues. It provides a clear and structured approach, guiding you through each step of the troubleshooting process. By following the steps Artikeld in the flowchart, you can effectively identify the root cause of the problem and determine the best course of action.
 This flowchart begins with an initial assessment of the roof vent issue, followed by a series of troubleshooting steps to pinpoint the problem. Based on the findings, the flowchart provides solution recommendations, including potential DIY fixes and when professional assistance is required.
Common Roof Vent Issues, Symptoms, and Solutions
| Issue | Symptoms | Solutions |
|---|---|---|
| Obstructed Vent | Reduced airflow, poor ventilation, musty odor, moisture buildup | Clean or remove obstructions, inspect for animal nests, consider professional cleaning if necessary |
| Damaged Vent | Cracks, holes, corrosion, loose or missing components, leaks | Repair or replace damaged components, consider professional assessment if extensive damage is present |
| Improper Installation | Inadequate ventilation, uneven airflow, leaks | Consult a professional for proper installation or reinstallation |
| Insufficient Ventilation | Excessive heat buildup, moisture accumulation, mold growth | Increase ventilation by adding more vents, ensuring proper vent sizing, consider professional evaluation |
| Poor Airflow | Stale air, poor air quality, inadequate ventilation | Check for obstructions, inspect vent components, consider professional assessment for airflow optimization |
Safety Precautions for Troubleshooting Roof Vent Problems
- Always prioritize safety when working on roof vents.
- Wear appropriate safety gear, including gloves, eye protection, and a sturdy ladder.
- Never attempt to work on the roof during inclement weather or high winds.
- If you are unsure about any aspect of the troubleshooting process, consult a qualified professional.
Glossary of Common Roof Vent Components
Vent Stack
The vertical portion of the vent that extends above the roofline.
Vent Cap
The protective covering at the top of the vent stack, preventing debris and rain from entering.
Vent Screen
A mesh or louvered panel that allows air to pass through while preventing larger objects from entering.
Vent Baffle
A deflector inside the vent that directs airflow and prevents backdraft.
Vent Damper
A movable flap that controls airflow through the vent, often used for energy efficiency.
DIY Repair Techniques
While it’s advisable to consult a professional for complex roof vent issues, some basic repairs can be tackled by homeowners with the right tools and knowledge. This section will guide you through common DIY roof vent repairs, including cleaning, sealing, and replacing components.
Remember, safety is paramount, so always prioritize your well-being and follow all safety precautions.
Cleaning Roof Vents
Regular cleaning is crucial for maintaining the efficiency and longevity of your roof vents. Accumulated debris, such as leaves, twigs, and animal nests, can obstruct airflow and reduce ventilation. Here’s a step-by-step guide to cleaning your roof vents:
- Safety First:Always wear appropriate safety gear, including gloves, eye protection, and a sturdy ladder. Secure the ladder properly before climbing onto the roof.
- Access the Vent:Locate the vent on your roof and carefully remove any covering or protective grill.
- Remove Debris:Use a brush, broom, or vacuum cleaner to remove any accumulated debris from the vent opening and the surrounding area. Be cautious not to damage the vent’s internal components.
- Inspect for Damage:Carefully examine the vent for any signs of damage, such as cracks, holes, or loose connections. If you find any damage, consult a professional for repair or replacement.
- Reinstall the Cover:Once the vent is clean and inspected, reinstall the cover or protective grill, ensuring it’s securely fastened.
Sealing Roof Vents
Over time, the seals around your roof vents can deteriorate, allowing air leaks and reducing energy efficiency. Sealing these leaks is a simple yet effective way to improve your home’s comfort and reduce energy bills. Here’s how to seal your roof vents:
- Identify Leaks:Look for signs of leaks, such as drafts around the vent, visible cracks in the sealant, or water damage around the vent area.
- Prepare the Surface:Clean the area around the vent with a damp cloth to remove dirt and debris. Allow the surface to dry completely before applying sealant.
- Apply Sealant:Use a high-quality sealant designed for roof applications. Apply a bead of sealant around the perimeter of the vent, ensuring a smooth and continuous seal. Press the sealant firmly against the surface to ensure good adhesion.
- Smooth the Sealant:Use a putty knife or your finger (wearing gloves) to smooth the sealant and create a uniform seal. Remove any excess sealant.
- Allow to Cure:Follow the manufacturer’s instructions for curing time. Avoid exposing the sealant to rain or moisture during this time.
Replacing Roof Vent Components
If your roof vent components, such as the flashing or the vent cover, are damaged or worn out, they may need to be replaced. This process typically involves removing the old components and installing new ones. Here’s a general guide to replacing roof vent components:
- Safety Precautions:Wear appropriate safety gear, including gloves, eye protection, and a sturdy ladder. Secure the ladder properly before climbing onto the roof.
- Remove the Old Components:Carefully remove the old vent cover, flashing, or other components. Use a pry bar or screwdriver if necessary, but be cautious not to damage the roof or surrounding area.
- Install New Components:Install the new components according to the manufacturer’s instructions. Ensure they are securely fastened and properly sealed to prevent leaks.
- Inspect for Leaks:After installation, carefully inspect the area around the vent for any leaks. If you find any leaks, tighten the fasteners or apply additional sealant.
Professional Repair Services
When DIY repairs are not feasible or you prefer professional expertise, several professional repair services specialize in roof vent repairs. These services can diagnose issues, recommend appropriate solutions, and perform repairs efficiently, ensuring proper ventilation and protecting your home from potential damage.
Professional Repair Services Comparison
Choosing the right professional repair service depends on your specific needs and budget. This table compares different professional repair services based on their specializations, areas of expertise, customer reviews, price range, warranty, and customer satisfaction ratings.
| Service | Specialization | Areas of Expertise | Price Range | Warranty | Customer Satisfaction Rating |
|---|---|---|---|---|---|
| ABC Roofing | Roofing and Ventilation | Roof vent installation, repair, and maintenance, including various types of vents | $200-$1000 | 1 year | 4.5/5 stars |
| Reliable HVAC | Heating, Ventilation, and Air Conditioning | Roof vent repair and replacement related to HVAC systems | $150-$800 | 1 year | 4/5 stars |
| Home Comfort Solutions | Home Improvement and Repairs | General home repairs, including roof vent issues | $100-$600 | 1 year | 3.5/5 stars |
Importance of Proper Ventilation
Roof vents play a crucial role in maintaining a healthy and comfortable indoor environment. They are essential components of a well-functioning home, ensuring adequate air circulation and temperature regulation.
Ventilation’s Role in a Healthy Home
Proper ventilation is vital for a healthy home environment. It helps prevent moisture buildup, improves air quality, and enhances energy efficiency.
Preventing Moisture Buildup and Mold Growth
Ventilation effectively removes excess moisture from the air, reducing the risk of condensation and mold growth. When warm, humid air escapes through vents, it prevents moisture from accumulating within the attic or crawl space. This is particularly important in areas with high humidity levels or during seasons with frequent rainfall.
Improving Indoor Air Quality
Ventilation plays a critical role in improving indoor air quality by removing pollutants and allergens. It helps to dilute and expel harmful substances such as carbon dioxide, volatile organic compounds (VOCs), and dust mites. Proper ventilation ensures a constant flow of fresh air, replacing stale air with cleaner, healthier air.
Enhancing Energy Efficiency
Adequate ventilation can contribute to energy efficiency by reducing the need for heating and cooling. During the summer, ventilation helps to cool the attic, preventing heat from transferring into the living space. In winter, ventilation can help to remove moisture from the air, preventing condensation and reducing the risk of frost buildup on windows and walls.
Potential Problems Associated with Inadequate Ventilation
Inadequate ventilation can lead to a range of problems, including mold growth, respiratory problems, and structural damage.
Mold Growth and Respiratory Problems
Insufficient ventilation can create a breeding ground for mold and mildew, which can thrive in damp, humid environments. Mold growth can lead to respiratory problems, particularly for individuals with allergies or asthma.
Structural Damage
Poor ventilation can also contribute to structural damage. Excessive moisture buildup can lead to rot, warping, and deterioration of wood framing, insulation, and other building materials.
Increased Energy Costs
Inadequate ventilation can increase energy costs. When the attic or crawl space becomes too hot or too cold, it can strain the HVAC system, requiring it to work harder to maintain a comfortable indoor temperature.
Reduced Building Lifespan
The cumulative effects of poor ventilation can shorten the lifespan of a building. Moisture damage, mold growth, and structural deterioration can significantly reduce the longevity of a home.
The Importance of Proper Ventilation: A Guide to a Healthy Home
Proper ventilation is essential for a healthy and comfortable home environment. By ensuring adequate airflow, homeowners can create a space that is free from moisture buildup, mold growth, and poor air quality.
Benefits of Proper Ventilation
Improved indoor air quality
Fresh air circulates, removing pollutants and allergens.
Reduced risk of mold growth
Moisture is removed, preventing dampness and mold development.
Enhanced energy efficiency
Reduced need for heating and cooling, saving energy and money.
Improved comfort
A well-ventilated home feels fresher and more comfortable.
Tips for Assessing and Improving Ventilation
Inspect your attic and crawl space
Look for signs of moisture buildup, mold growth, or poor ventilation.
Check your roof vents
Ensure they are clean, unobstructed, and functioning properly.
Consider installing additional vents
If your home has inadequate ventilation, consider adding more vents.
Use exhaust fans
Utilize exhaust fans in bathrooms, kitchens, and laundry rooms to remove moisture and pollutants.
Open windows regularly
Allow fresh air to circulate throughout your home.
Regular Maintenance and Inspection
Regular maintenance and inspection of ventilation systems are crucial for ensuring optimal performance. Clean vents, remove debris, and check for any signs of damage.
Key Questions Answered
What are the signs of a roof vent problem?
Common signs include unusual noises from the vent, cold drafts near the vent, high heating bills, and a noticeable decrease in heating efficiency.
How often should I have my roof vents inspected?
It’s recommended to have your roof vents inspected at least once a year, ideally before the heating season begins.
Can I clean my roof vents myself?
For simple cleaning, you can try removing debris and obstructions from the vent yourself. However, if you notice damage or suspect a more complex issue, it’s best to consult a professional.
How much does it cost to repair a roof vent?
The cost of roof vent repair can vary depending on the type of vent, the complexity of the repair, and the location of the vent. It’s best to get quotes from multiple contractors for comparison.
