How to fix burnt vape? It’s a question that every vaper dreads. That acrid, burnt taste and the diminished vapor production are telltale signs that something is wrong. Burnt coils are a common issue, but understanding the causes and implementing preventative measures can help you avoid them altogether.
From identifying the root of the problem to implementing proper cleaning and maintenance routines, this comprehensive guide will equip you with the knowledge and skills to keep your vaping experience smooth and satisfying.
The burning of a vape coil is often a result of excessive heat, dry wick, or improper airflow. These factors can lead to the coil overheating and burning the wicking material, resulting in a burnt taste and reduced vapor production.
While a burnt coil may seem like a vaping disaster, it’s often a simple fix. By understanding the causes and implementing proper maintenance practices, you can extend the lifespan of your coils and prevent future burns.
Understanding Burnt Coils
A burnt coil is a common issue in vaping, and it can significantly impact the overall vaping experience. Understanding the causes, signs, and consequences of burnt coils is crucial for any vaper, as it can help prevent damage to your device and ensure a safe and enjoyable vaping experience.
The Process of Coil Burning
Coil burning occurs when the heating element in your vape tank, known as the coil, gets too hot and burns the wicking material. This material, typically made of cotton or other absorbent materials, is responsible for delivering e-liquid to the coil.
The chemical reaction involved in coil burning is complex, but it essentially involves the rapid oxidation of the wicking material and e-liquid, producing harmful byproducts like acrolein and formaldehyde.
The wick plays a vital role in the vaping process by absorbing e-liquid and delivering it to the coil for vaporization. When the wick becomes dry, the coil can overheat, leading to burning. The e-liquid itself also plays a role in coil burning.
E-liquids with high VG (vegetable glycerin) content can be thicker and may require more power to vaporize, increasing the risk of coil burning.Several factors can contribute to coil burning, including:
- Excessive Heat:Vaping at a wattage that is too high for the coil can cause it to overheat and burn the wick.
- Dry Wick:When the wick runs out of e-liquid, it can dry out and become susceptible to burning.
- Improper Airflow:Insufficient airflow can cause the coil to overheat, leading to burning.
Signs of a Burnt Coil
Recognizing the signs of a burnt coil is essential for preventing further damage to your device and ensuring a safe vaping experience.
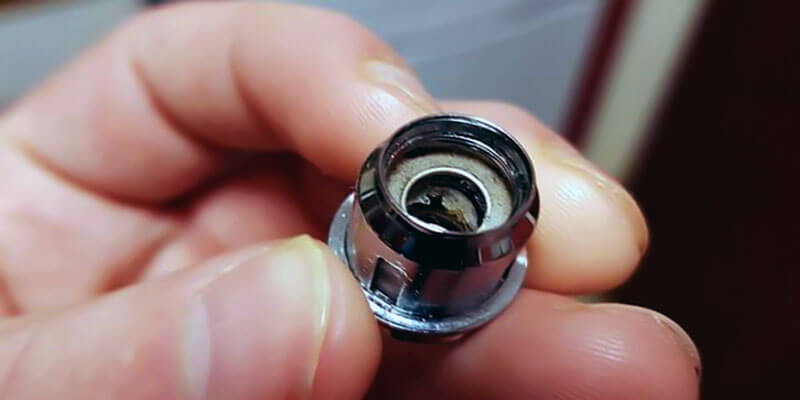
- Visual Cues:A burnt coil will often have a blackened or discolored appearance. The wicking material may also be charred or brittle.
- Taste and Smell:A burnt coil produces a harsh, burnt taste and smell that is often described as acrid or chemical-like.
- Vapor Production and Airflow:A burnt coil will typically produce less vapor than a healthy coil, and the airflow may be restricted.
Consequences of Using a Burnt Coil
Using a burnt coil can have several negative consequences, including:
- Health Risks:Inhaling the burnt residue from a coil can expose you to harmful chemicals like acrolein and formaldehyde, which can irritate the lungs and have long-term health effects.
- Flavor and Vapor Production:A burnt coil will significantly impact the flavor and vapor production of your vape, making it unpleasant to use.
- Damage to Vape Device:A burnt coil can damage your vape device, especially if it is left to burn for an extended period. The burnt residue can clog the airflow and damage the coil itself, potentially requiring a replacement.
Recognizing and avoiding burnt coils is crucial for maintaining a safe and enjoyable vaping experience. By understanding the causes and signs of burnt coils, vapers can take steps to prevent them and protect their health and devices.
Identifying the Cause

A burnt coil, unfortunately, is a common occurrence in the vaping world. Understanding the root causes is crucial to prevent future incidents and ensure a smooth vaping experience. Several factors contribute to coil burning, each playing a significant role in the process.
Factors Contributing to Coil Burning
- Wattage: Exceeding the recommended wattage for your coil can lead to excessive heat, causing the wicking material to burn. This is because higher wattage generates more heat, potentially exceeding the wick’s ability to absorb and deliver e-liquid.
- Airflow: Insufficient airflow restricts the cooling of the coil, causing it to overheat. A limited airflow can lead to a build-up of heat, ultimately leading to the burning of the wicking material.
- E-liquid: The type of e-liquid used can also contribute to coil burning. Thicker e-liquids, particularly those with a high VG (vegetable glycerin) content, can be more challenging for the coil to wick effectively, resulting in a dry hit and potential burning.
Common User Mistakes
- Over-priming: Excessive e-liquid saturation of the wick can lead to flooding and potential coil burning. Excess liquid can pool around the coil, hindering its ability to heat up properly, leading to a burnt taste.
- Chain Vaping: Continuous vaping without allowing the coil to cool down can lead to overheating and burning. It’s crucial to allow for breaks between vaping sessions to ensure the coil doesn’t overheat.
- Incorrect Coil Selection: Using a coil with a lower resistance than your device’s recommended wattage can lead to excessive heat and potential burning. Always choose a coil that is compatible with your device’s capabilities.
- Neglecting Maintenance: Regular cleaning and maintenance of your vaping device are essential to prevent coil burning. Accumulated residue and dirt can impede airflow and hinder the coil’s performance, ultimately leading to burning.
3. Cleaning and Maintenance
Cleaning a burnt coil is an essential part of vape maintenance. Burnt coils can produce unpleasant flavors and even damage your device. Regular cleaning can help extend the life of your coils and keep your vaping experience enjoyable.
3.1 Cleaning a Burnt Coil
Cleaning a burnt coil involves removing the residue that has built up on the coil. This can be done by using a variety of tools and materials, including cotton swabs, toothpicks, small brushes, isopropyl alcohol, and distilled water.
- Disassemble the device:Carefully remove the coil from your vape device. This may involve unscrewing the atomizer or tank. Ensure you have a clean surface to work on.
- Remove burnt residue:Gently use a cotton swab or toothpick to remove any visible burnt residue from the coil. Be careful not to damage the coil.
- Rinse and dry:Rinse the coil with distilled water or isopropyl alcohol to remove any remaining residue. Allow the coil to dry completely before reassembling your device.
3.2 Tools and Materials
The following tools and materials are essential for cleaning a burnt coil:
- Cleaning tools:Cotton swabs, toothpicks, small brushes, and a paper towel are useful for cleaning the coil and removing residue.
- Cleaning solutions:Isopropyl alcohol and distilled water are effective for cleaning the coil. Use isopropyl alcohol for a deeper clean, and distilled water for a gentler approach.
- Safety equipment:Gloves and eye protection are recommended when using isopropyl alcohol to avoid skin and eye irritation.
3.3 Preventing Future Coil Burns
Preventing coil burns is crucial for maintaining the quality of your vaping experience and prolonging the lifespan of your coils. Here are some tips to avoid future burns:
- Proper wicking:Ensure the coil is adequately wicking by using the correct amount of cotton and making sure the cotton is not too tight or too loose.
- Choosing the right wattage:Use the appropriate wattage for your coil. Wattage is the power output of your vape device and directly affects the heat generated by the coil. A higher wattage will generate more heat, which can lead to coil burns.
- Regular maintenance:Clean your coils regularly to prevent the buildup of residue. Replace your coils when they start to show signs of wear and tear.
3.4 Coil Material Comparison
Different coil materials have varying properties that affect their performance and susceptibility to burning. Here’s a comparison of popular coil materials:
| Material | Resistance | Temperature Coefficient | Susceptibility to Burning |
|---|---|---|---|
| Kanthal | High | Low | Low |
| Stainless Steel | Medium | Medium | Medium |
| Nickel | Low | High | High |
| Titanium | Low | High | High |
Replacing the Coil: How To Fix Burnt Vape
A burnt coil is a common problem for vapers, but it’s a relatively easy fix. Replacing the coil is a simple process that involves removing the old coil and installing a new one. Here’s a step-by-step guide on how to safely replace a burnt coil in your vape device.
Removing the Old Coil
To safely remove the old coil, you’ll need a few basic tools:
- A pair of tweezers
- A small screwdriver (if your coil is secured by screws)
- A cotton swab
- A paper towel
Before starting, ensure your vape device is turned off and unplugged. Then, follow these steps:
- Remove the tank or atomizer from your vape device.
- Unscrew the base of the tank or atomizer to access the coil.
- Use tweezers to gently remove the old coil from the base. Be careful not to damage the threading or the tank.
- Use a cotton swab and paper towel to clean any residue from the base where the coil was attached.
Installing the New Coil
Once the old coil is removed, you can install the new one. Before installing the new coil, it’s important to prime it by dripping a few drops of e-liquid onto the cotton wicking material. This helps prevent dry hits, which can damage the coil.
- Screw the new coil into the base of the tank or atomizer.
- Ensure the coil is securely tightened, but avoid overtightening.
- Reassemble the tank or atomizer and attach it to your vape device.
- Fill the tank with e-liquid and allow it to sit for a few minutes to ensure the cotton is fully saturated.
Types of Coils
Coils come in various types, each with its own characteristics and compatibility with different vape devices.
- Material: Coils are typically made from Kanthal, NiChrome, or Stainless Steel. Each material has different properties that affect the heating performance and longevity of the coil.
- Resistance: Coils are rated in ohms (Ω), which measures the resistance to electrical current. Lower resistance coils require higher wattage output to heat up, resulting in larger clouds and more intense flavor.
Here’s a table outlining common coil types and their compatibility with various vape devices:| Coil Type | Material | Resistance (Ω) | Wattage Range | Compatibility ||—|—|—|—|—|| Sub-ohm coil | Kanthal, NiChrome, Stainless Steel | 0.2-0.5 | 40-80W | Sub-ohm tanks || Rebuildable coil | Kanthal, NiChrome, Stainless Steel | 0.1-0.3 | 60-100W | Rebuildable atomizers || Standard coil | Kanthal, NiChrome | 1.0-1.5 | 10-20W | Standard tanks |
Choosing the Right Coil
Choosing the right coil depends on your vaping style, the wattage output of your device, and the type of e-liquid you use.
- Vaping Style: Cloud chasers prefer sub-ohm coils for large clouds, while flavor chasers prefer standard coils for more nuanced flavor.
- Wattage Output: Ensure the coil’s resistance matches your device’s wattage output. Using a coil with too low of resistance can damage your device.
- E-liquid Type: High VG e-liquids require coils with larger wicking material to handle the thicker consistency.
For optimal performance, it’s important to choose a coil that’s compatible with your vape device and vaping style. By understanding the different types of coils and their characteristics, you can ensure you’re using the right coil for your vaping needs.
5. Avoiding Future Burns
Preventing coil burns is essential for maintaining a satisfying vaping experience. Understanding the factors that contribute to coil burning allows you to adjust your vaping habits and make informed decisions regarding your e-liquid and wattage settings. This section will delve into the crucial aspects of preventing future coil burns.
Wattage and Coil Burning
Wattage plays a pivotal role in coil lifespan and vaping performance. Higher wattage settings generate more heat, which can lead to faster coil deterioration and even burning.
- Understanding the Relationship: Wattage is the power output of your vape device, directly impacting the coil’s temperature. Higher wattage means more heat, potentially exceeding the coil’s recommended temperature limit.
- The Importance of Coil Limits: Every coil has a specific wattage range within which it operates optimally. Exceeding this range can cause the coil to overheat, leading to burning and a burnt taste.
- Determining the Right Wattage: Most coils come with recommended wattage ranges printed on the packaging. Consult the manufacturer’s s for the specific coil you are using. Alternatively, start at a lower wattage setting and gradually increase it until you find a sweet spot that provides satisfying vapor production without any burning.
E-Liquid Selection
E-liquid viscosity, or thickness, plays a significant role in coil longevity. Choosing the right e-liquid for your coil type and wattage setting is crucial for preventing burning.
- The Role of Viscosity: Thicker e-liquids can clog the coil’s wicking material, hindering proper liquid flow and leading to overheating and burning.
- Matching E-Liquid to Coil Type: Sub-ohm coils, designed for higher wattage settings, generally require thinner e-liquids. Higher VG (vegetable glycerin) content in e-liquids results in thicker consistency.
- E-Liquid Recommendations: For sub-ohm coils, consider e-liquids with a higher PG (propylene glycol) content or a balanced VG/PG ratio. For higher resistance coils, thicker e-liquids with a higher VG content are typically suitable.
Coil Types and Wattage Ranges
Different coil types have varying resistance levels and recommended wattage ranges. Understanding these differences is crucial for selecting the right coil for your vaping preferences and preventing burning.
| Coil Type | Resistance (Ohms) | Recommended Wattage Range |
|---|---|---|
| Kanthal | 0.2
| 30
|
| NiChrome | 0.1
| 40 While a burnt vape coil can be frustrating, it’s not always a sign of a lost cause. Sometimes, a simple cleaning can revive your device, but if the damage is more severe, you might need to consider a replacement. Similar to the question of whether is Stitch Fix a thrift store , it’s important to assess the situation before making a decision. Just like Stitch Fix offers a curated experience, finding the right replacement coil for your vape can also be a tailored process, ensuring you get the best performance from your device.
|
| Stainless Steel | 0.1
| 35
|
Note: These are general recommendations, and specific wattage ranges may vary depending on the coil’s design and construction. Always consult the manufacturer’s s for the most accurate information.
Preventing Coil Burning, How to fix burnt vape
Adopting responsible vaping habits and making conscious choices about your e-liquid and wattage settings can significantly reduce the risk of coil burning.
- Start Low, Go Slow: When using a new coil, start at a lower wattage setting and gradually increase it until you find a sweet spot that provides satisfying vapor production without any burning.
- Recognize the Signs: Pay attention to any changes in taste or vapor production. A burnt taste or a decrease in vapor indicates that the coil is overheating.
- Adjust Your Vaping Habits: Avoid taking long, continuous puffs. Allow the coil to cool down between puffs.
- Clean and Maintain Your Coil: Regularly clean your coil to remove any residue that may contribute to clogging and burning.
- Replace Burnt Coils: If a coil has been burnt, it is best to replace it with a new one. Attempting to salvage a burnt coil can lead to further damage and potentially harmful substances being released.
Additional Considerations
Beyond wattage and e-liquid selection, other factors can influence coil longevity and prevent burning.
- Airflow and Wicking: Proper airflow and wicking are crucial for maintaining optimal coil temperature and preventing burning. Adequate airflow allows for proper cooling, while efficient wicking ensures consistent liquid flow.
- High-Quality Products: Using high-quality e-liquids and coils from reputable manufacturers is essential for a safe and enjoyable vaping experience. Avoid counterfeit products or those with unknown origins.
- Follow Manufacturer’s s: Always read and follow the manufacturer’s s for your specific device and coils. This ensures safe and optimal operation.
Troubleshooting Burnt Coils
Troubleshooting burnt coils involves identifying the root cause of the issue and implementing solutions to restore proper functionality. It requires a systematic approach to diagnose and address the underlying problem, ultimately aiming to prevent future occurrences.
Troubleshooting Techniques
Burnt coils often exhibit distinct symptoms, each indicating a specific problem. Identifying these symptoms can help narrow down the cause and guide the troubleshooting process.
- Reduced Vapor Production:This indicates a partial or complete blockage of the coil, hindering the flow of e-liquid and vapor. It could be due to accumulated residue or a burnt wick.
- Dry Hits:These occur when the wick is unable to adequately absorb e-liquid, leading to a burnt taste and potential coil damage. This can be caused by insufficient e-liquid supply, a dry wick, or a clogged wick.
- Gurgling Sounds:This indicates excess e-liquid pooling in the coil, obstructing airflow and potentially leading to flooding. This can happen due to overfilling the tank or a faulty coil.
Flowchart for Diagnosing and Fixing a Burnt Coil
A flowchart provides a structured approach to troubleshooting a burnt coil, ensuring a systematic and efficient process.
- Step 1:Inspect the coil for any visible signs of damage, such as a burnt wick or a broken wire.
- Step 2:Check the e-liquid level in the tank. Ensure sufficient e-liquid is available to saturate the wick.
- Step 3:If the coil appears clean and the e-liquid level is sufficient, try priming the coil by dripping a few drops of e-liquid onto the wick.
- Step 4:If the problem persists, try cleaning the coil with a cotton swab dipped in isopropyl alcohol.
- Step 5:If cleaning doesn’t resolve the issue, the coil might be irreparably damaged and needs to be replaced.
Identifying and Addressing Specific Symptoms
Specific symptoms can help pinpoint the cause of a burnt coil and guide the appropriate troubleshooting steps.
- Reduced Vapor Production:If the coil is producing significantly less vapor than usual, it could be due to a clogged wick or a burnt wick. Cleaning the coil or replacing it might resolve the issue.
- Dry Hits:If you experience dry hits, it indicates the wick is not adequately saturated with e-liquid. Ensure sufficient e-liquid is available and try priming the coil.
- Gurgling Sounds:If the coil is gurgling, it indicates excess e-liquid pooling in the coil. This can be addressed by reducing the e-liquid level or replacing the coil.
Understanding Coil Lifespan
Every vape coil has a limited lifespan. Understanding the factors that influence coil lifespan is crucial for optimizing your vaping experience and ensuring a smooth transition to a new coil.
Factors Influencing Coil Lifespan
The lifespan of a vape coil is influenced by several factors, including:
- E-liquid Composition:The type of e-liquid you use can significantly affect coil lifespan. E-liquids with high VG (vegetable glycerin) content tend to be thicker and can lead to faster coil degradation. Conversely, e-liquids with a high PG (propylene glycol) content are thinner and may extend coil lifespan.
- Vaping Frequency and Power:Frequent vaping and high wattage settings can accelerate coil degradation. Higher temperatures lead to faster coil burnout.
- Coil Material and Construction:Different coil materials and constructions have varying lifespans. Kanthal coils, for example, are known for their durability and longevity, while nickel coils may have a shorter lifespan.
- Cleaning and Maintenance:Proper cleaning and maintenance of your vape tank and coils can significantly extend their lifespan. Regular cleaning can prevent residue buildup and extend the coil’s performance.
- Environmental Factors:Exposure to extreme temperatures, humidity, and dust can also affect coil lifespan.
Coil Lifespan Comparison
Different coil types have varying lifespans:
- Kanthal Coils:These coils are known for their durability and longevity, often lasting several weeks or even months with proper care.
- Stainless Steel Coils:Stainless steel coils offer good durability and can last for several weeks with regular maintenance.
- Nickel Coils:Nickel coils are known for their rapid heating capabilities, but they may have a shorter lifespan than other materials.
- Titanium Coils:Titanium coils offer good durability and can last for several weeks with proper care.
Tips for Extending Coil Lifespan
Here are some tips to extend the life of your vape coils:
- Use high-quality e-liquids:High-quality e-liquids with balanced VG/PG ratios can help prevent premature coil burnout.
- Avoid over-priming:Over-priming can lead to flooding and damage your coil.
- Prime your coils properly:Ensure your coils are properly primed with e-liquid before vaping.
- Clean your coils regularly:Regular cleaning can help prevent residue buildup and extend coil lifespan.
- Use a lower wattage setting:Lower wattage settings can help reduce coil wear and tear.
- Avoid dry hits:Dry hits can damage your coils, so ensure your tank is always filled with e-liquid.
- Store your coils properly:Store your coils in a dry and cool place to prevent damage.
Recognizing Fake Vape Coils
The vaping community is increasingly facing the challenge of counterfeit coils. These imitations can pose serious risks to your health, device, and overall vaping experience. Therefore, it’s crucial to be able to identify fake coils and purchase genuine products from reputable sources.
This guide will equip you with the knowledge and tools to distinguish authentic coils from counterfeits, ensuring a safe and enjoyable vaping experience.
Identifying Counterfeit Coils
Counterfeit vape coils are often designed to mimic the appearance of genuine products, but closer inspection reveals telltale signs of their fraudulent nature. To ensure you’re using authentic coils, it’s essential to pay attention to both visual and performance aspects.
Visual Inspection
- Packaging:Authentic vape coils come in professionally designed packaging with clear branding and product information. Counterfeit coils often have misspellings, blurry images, or inconsistent branding. Compare the packaging of your coil to genuine products online or in reputable vape shops to spot any discrepancies.
- Coil Construction:Examine the coil’s build quality. Authentic coils are meticulously crafted with even wire wraps, secure connections, and high-quality insulation. Counterfeit coils may exhibit uneven wire wraps, loose connections, or poor insulation, indicating a lack of attention to detail and potential safety hazards.
- Material:Authentic vape coils are made from high-quality materials, such as stainless steel or kanthal wire, which are designed for durability and optimal performance. Counterfeit coils may use cheaper, less durable materials that can affect the coil’s lifespan and overall performance.
Inspect the materials used in the coil’s construction for any signs of inferior quality.
Performance
- Taste:One of the most noticeable differences between authentic and counterfeit coils is the taste. Genuine coils produce a clean, consistent flavor that accurately reflects the e-liquid you’re using. Fake coils, on the other hand, may produce an off-taste or a burnt flavor, even when using fresh e-liquid.
If you notice an unusual or unpleasant taste, it could be a sign of a counterfeit coil.
- Vapor Production:Counterfeit coils often produce less vapor or inconsistent cloud production compared to authentic coils. The vapor may be thin, wispy, or inconsistent in density, indicating a problem with the coil’s performance. Authentic coils are designed to produce dense, flavorful vapor with consistent cloud production.
- Coil Life:Counterfeit coils typically have a shorter lifespan than genuine coils. They may burn out quickly or exhibit premature signs of wear and tear, requiring frequent replacements. If you find yourself replacing your coils more often than usual, it could be a sign of using counterfeit products.
Risks of Using Fake Coils
Using counterfeit vape coils can have serious consequences for your health, device, and overall vaping experience. It’s important to understand the potential risks associated with these imitations.
- Health Risks:Counterfeit coils may contain harmful substances, such as lead or cadmium, which can be inhaled when vaping. These substances can pose serious health risks, including respiratory problems, cardiovascular issues, and even cancer. Always prioritize your health and choose authentic coils from reputable sources to avoid potential health hazards.
- Device Damage:Fake coils can cause damage to your vape device due to poor quality or inconsistent resistance. The coil’s resistance may not match the device’s specifications, leading to overheating, malfunction, or even permanent damage to the device’s circuitry. Avoid potential device damage by using authentic coils that are compatible with your vaping setup.
- Safety Concerns:Counterfeit coils may overheat or malfunction, posing a fire hazard. The use of cheap materials and inconsistent construction can lead to electrical shorts, overheating, or even explosions. Always exercise caution when vaping and choose authentic coils from reputable sources to minimize safety risks.
Alternative Solutions
Burnt coils are a common problem for vapers, and while replacing them is the easiest solution, it can get expensive in the long run. Luckily, there are alternative solutions, such as rebuilding coils, which can be more cost-effective and offer greater customization.
Rebuilding Coils
Rebuilding coils involves creating your own coil by wrapping wire around a coil jig. This allows you to customize the resistance and material of your coil, leading to a more personalized vaping experience.
Tools and Materials
To rebuild coils, you will need the following tools and materials:
- Coil jig: This tool helps you create evenly spaced coils.
- Wire cutters: Used for cutting wire to the desired length.
- Tweezers: For manipulating wire and coil placement.
- Screwdriver: For tightening screws on the atomizer.
- Cotton: For wicking the coil.
- Wire: The material used for creating the coil.
Types of Wire
There are different types of wire used for coil rebuilding, each with its own characteristics:
- Kanthal: A common wire type known for its durability and resistance to oxidation. It produces a consistent flavor and vapor production.
- NiChrome: A nickel-chromium alloy that heats up quickly and cools down rapidly, making it suitable for temperature control vaping.
- Stainless Steel: A durable and versatile wire that can be used for both regular and temperature control vaping. It’s known for its longevity and resistance to corrosion.
- Titanium: A lightweight and high-temperature resistant wire, often used for temperature control vaping. It offers fast heating and cooling, producing a smooth vape.
Coil Resistance
Coil resistance is measured in ohms and affects the vaping experience. Lower resistance coils heat up faster and produce more vapor, while higher resistance coils provide a smoother and cooler vape.
The resistance of a coil is inversely proportional to the amount of power it draws. A lower resistance coil will draw more power, resulting in a hotter vape.
Advantages of Rebuilding Coils
- Cost-effectiveness: Rebuilding coils can be significantly cheaper than buying pre-made coils, especially in the long run.
- Customization: Rebuilding allows users to create custom coils with specific resistances and materials to optimize vaping experience.
- Durability: Well-built coils can last significantly longer than pre-made coils, reducing the need for frequent replacements.
Disadvantages of Rebuilding Coils
- Learning curve: Rebuilding coils requires learning new skills and techniques, which can be challenging for beginners.
- Potential for damage: Improper rebuilding can lead to damage to the device or coil, requiring costly repairs or replacements.
- Time commitment: Rebuilding coils takes time and effort, especially for complex builds, which may not be suitable for those who prefer convenience.
Learning Coil Rebuilding Techniques
There are numerous resources available to help you learn coil rebuilding techniques, including:
- Websites: Vape websites often have detailed tutorials and guides on coil rebuilding, covering various techniques and wire types.
- Forums: Online vaping forums are excellent places to connect with experienced rebuilders and ask questions about specific techniques or troubleshooting issues.
- YouTube Channels: Many YouTube channels dedicated to vaping offer comprehensive tutorials on coil rebuilding, covering basic to advanced techniques, such as parallel and series coil builds.
Safety Precautions

While vaping can be a pleasurable experience, it’s crucial to prioritize safety when dealing with vape devices and coils. Burnt coils pose potential hazards, and neglecting safety measures can lead to accidents or injuries. Understanding and adhering to safety guidelines is essential for a safe vaping experience.
Handling Burnt Coils Safely
Burnt coils can release harmful substances into the air, potentially causing respiratory irritation or allergic reactions. It’s crucial to handle burnt coils with caution to minimize exposure to these substances.
- Wear gloves:Always wear gloves when handling burnt coils to prevent direct skin contact with potentially harmful substances. Disposable nitrile gloves are a suitable option.
- Work in a well-ventilated area:Ensure adequate ventilation to minimize exposure to fumes released from burnt coils. Opening windows or using an exhaust fan can improve air circulation.
- Avoid inhaling fumes:Never inhale the fumes released from burnt coils. These fumes can be harmful to your respiratory system.
Disposing of Burnt Coils Safely
Proper disposal of burnt coils is essential to prevent environmental contamination and potential hazards.
- Do not throw burnt coils in the trash:Burnt coils can contain hazardous materials that should not be disposed of in regular trash.
- Wrap burnt coils in a plastic bag:Wrap burnt coils in a sealed plastic bag to prevent them from coming into contact with other materials and to contain any potential contaminants.
- Dispose of the bag in a designated hazardous waste container:Check with your local waste management facility for guidelines on disposing of hazardous materials. Many facilities have designated containers for e-waste, which can be used to dispose of burnt coils.
General Safety Precautions
- Never leave a vape device unattended while it’s charging:Overheating or short circuits can occur during charging, posing fire hazards. Always supervise your device while charging.
- Avoid using damaged or defective vape devices or coils:Damaged or defective devices or coils can malfunction and pose safety risks. Replace them immediately.
- Store vape devices and coils in a cool, dry place:Extreme temperatures can damage vape devices and coils. Store them in a safe, dry location.
- Keep vape devices away from children and pets:Vaping products can be harmful if ingested or inhaled by children or pets. Store them securely out of reach.
Community Resources
The vaping community is a valuable resource for troubleshooting and resolving issues like burnt coils. Engaging with experienced vapers can provide insightful advice and practical solutions.
Online Communities and Forums
Online forums and communities dedicated to vaping offer a platform for sharing experiences, seeking advice, and connecting with other vapers. These platforms are invaluable for obtaining information and troubleshooting common problems.
- Reddit:Subreddits like r/electronic_cigarette and r/Vaping are popular destinations for vapers to discuss various topics, including coil maintenance and troubleshooting.
- Vape Forums:Websites like ECF (E-Cigarette Forum) and Reddit offer dedicated forums for discussing specific aspects of vaping, including coil burning and its prevention.
- Social Media Groups:Facebook groups and other social media platforms host communities where vapers share their experiences, tips, and advice on coil care and maintenance.
Benefits of Seeking Advice from Experienced Vapers
Experienced vapers have a wealth of knowledge and practical experience in coil maintenance and troubleshooting.
- Troubleshooting Tips:Experienced vapers can offer valuable tips on identifying the cause of a burnt coil and recommend appropriate solutions.
- Product Recommendations:They can provide recommendations for specific coils, liquids, and devices based on their expertise and experience.
- Community Support:Engaging with experienced vapers can provide a sense of community and support, especially when facing challenges with vaping equipment.
Reputable Sources of Information on Coil Burning and Vape Safety
Reliable information is crucial for understanding coil burning and ensuring vape safety.
- Vape Industry Associations:Organizations like the Vapor Technology Association (VTA) and the UKVIA (UK Vaping Industry Association) promote responsible vaping practices and provide resources on coil care and safety.
- Scientific Research:Research published in reputable scientific journals can provide insights into the effects of vaping and the potential risks associated with coil burning.
- Government Agencies:Agencies like the FDA (Food and Drug Administration) in the US and the MHRA (Medicines and Healthcare products Regulatory Agency) in the UK provide information on vaping regulations and safety guidelines.
Impact of E-Liquid
The type of e-liquid you use can significantly impact the lifespan of your vape coil. Different e-liquids have varying compositions, including varying levels of viscosity, sweetness, and VG/PG ratios, which can influence how quickly your coil burns out. Understanding the relationship between e-liquid characteristics and coil lifespan can help you make informed choices to extend the life of your coils and enjoy a smoother vaping experience.
E-Liquid Viscosity and Coil Burning
The viscosity of an e-liquid refers to its thickness or resistance to flow. Higher viscosity e-liquids, typically those with a higher VG (vegetable glycerin) content, are thicker and flow more slowly. This can lead to a build-up of residue on the coil, which can cause it to burn faster.
Conversely, lower viscosity e-liquids, often with a higher PG (propylene glycol) content, are thinner and flow more easily, minimizing residue buildup and extending coil lifespan.
Thicker e-liquids tend to burn coils faster due to increased residue build-up, while thinner e-liquids promote cleaner burning and longer coil lifespan.
Choosing E-Liquids to Minimize Coil Burns
To minimize the risk of coil burns, consider the following tips when choosing e-liquids:
- Opt for e-liquids with a lower VG/PG ratio.This will generally result in a thinner e-liquid, reducing residue buildup and extending coil lifespan. A 70/30 VG/PG ratio is a good starting point for many vapers.
- Avoid e-liquids with high sugar content.Sugary e-liquids can caramelize and stick to the coil, leading to faster burning. Look for e-liquids with minimal or no added sweeteners.
- Choose e-liquids with a higher PG content.PG is thinner than VG and flows more easily, reducing the risk of residue buildup.
- Experiment with different e-liquids.Not all e-liquids are created equal, and what works well for one person may not work for another. Try different brands and ratios to find what works best for your coil and vaping preferences.
Coil Building Fundamentals
Embarking on the journey of DIY vaping opens up a world of customization and control, and coil building is a key aspect of this exciting experience. This guide will equip you with the essential knowledge to build your own coils, allowing you to fine-tune your vaping experience for optimal flavor, vapor production, and cost savings.Coil building involves creating a heating element, typically made from wire, that vaporizes e-liquid.
Understanding the fundamental principles of coil building, including wire gauge, coil resistance, and wicking, is crucial for successful and enjoyable vaping.
Tools and Materials
Before diving into coil building, gather the essential tools and materials. Here’s a list of tools you’ll need:
- Coil Jig or Screwdriver:A coil jig or screwdriver helps to create consistent and even coils. It acts as a guide for winding the wire around the desired diameter.
- Wire Cutters:Use wire cutters to cut the wire to the desired length. Make sure the cutters are sharp and clean to avoid damaging the wire.
- Tweezers:Tweezers are essential for manipulating the coil during the building process. They help with positioning, shaping, and securing the coil.
- Ohm Meter:An ohm meter is crucial for measuring the resistance of your coil. This ensures it falls within the safe operating range of your vaping device.
- Scissors:Scissors are used for trimming and shaping the wicking material. Choose scissors with sharp blades for clean cuts.
- Cotton or Other Wicking Material:Wicking material is responsible for delivering e-liquid to the coil. Cotton is the most common choice, but other materials like silica or ceramic are also available.
- Optional: Soldering Iron and Flux:While not essential for basic coil building, a soldering iron and flux can be useful for more advanced builds or for creating connections between different wires.
Choosing the Right Materials
The choice of wire and wicking material significantly influences the performance and vaping experience.
Wire
- Kanthal:Kanthal is a popular choice for sub-ohm vaping. It has a high resistance, making it suitable for lower power settings. Kanthal is known for its durability and consistency.
- Nichrome:Nichrome offers a balance of resistance and temperature coefficient, making it suitable for both sub-ohm and rebuildable dripping atomizers (RDAs). It provides a good balance of flavor and vapor production.
- Stainless Steel:Stainless steel is commonly used for temperature control vaping. It has a low resistance and a high temperature coefficient, allowing for precise temperature regulation.
- Titanium:Titanium is another option for temperature control vaping. It has the lowest resistance among the common wire types, making it ideal for high-power vaping.
Here’s a table comparing the properties of different wire types:
| Wire Type | Resistance (Ω/m) | Temperature Coefficient | Vaping Style |
|---|---|---|---|
| Kanthal | High | Low | Sub-ohm vaping |
| Nichrome | Medium | Medium | Sub-ohm and rebuildable dripping atomizers (RDAs) |
| Stainless Steel | Low | High | Temperature control vaping |
| Titanium | Very low | High | Temperature control vaping |
Wicking
Wicking plays a vital role in delivering e-liquid to the coil, ensuring a consistent and flavorful vaping experience.
- Cotton:Cotton is the most popular wicking material due to its natural properties. It absorbs e-liquid efficiently and provides a clean taste. Choose organic cotton that is free from impurities.
- Silica:Silica is a synthetic material that is heat-resistant and durable. It is often used for high-power vaping and can handle higher temperatures.
- Ceramic:Ceramic wicking is becoming increasingly popular due to its durability and ability to withstand high temperatures. It is known for its consistent performance and long lifespan.
When choosing a wicking material, consider the coil build and vaping style. For example, cotton is ideal for most builds, while silica might be better suited for high-power setups.Properly preparing and cutting wicking materials is crucial for optimal performance.
Always follow the manufacturer’s instructions for preparing and cutting wicking materials.
Tips for Beginners
Starting with simple coil designs and understanding the basics of coil resistance and wicking will ensure a smooth learning curve.
- Start with Simple Coil Designs:Begin with single-coil builds to get comfortable with the process. Once you’re confident, you can explore more complex builds.
- Understand Coil Resistance:The resistance of your coil determines the amount of power it needs to operate. A lower resistance requires more power, while a higher resistance requires less power. Refer to your vaping device’s manual for recommended resistance ranges.
- Properly Wicking the Coil:Wicking the coil correctly is essential for a satisfying vaping experience. The wicking material should be evenly distributed around the coil, allowing for efficient e-liquid absorption without causing dry hits or flooding.
- Safety Precautions:Always exercise caution when working with electrical components. Ensure the device is turned off and the battery is disconnected before handling the coil.
Additional Resources
The world of coil building is vast and constantly evolving. Online resources can provide valuable insights and support your learning journey.
- Tutorials:Numerous websites and YouTube channels offer detailed tutorials on coil building techniques, from basic to advanced.
- Forums:Vape forums are excellent platforms to connect with experienced builders and learn from their expertise. You can ask questions, share your experiences, and find helpful tips.
- Community Groups:Local vape shops often host workshops and meetups where you can learn from experienced builders and interact with other enthusiasts.
Questions and Answers
How often should I replace my vape coils?
The lifespan of a vape coil varies depending on factors like usage, e-liquid viscosity, and wattage settings. Generally, coils should be replaced every 1-2 weeks for optimal performance and flavor. However, if you notice a burnt taste, reduced vapor production, or any signs of damage, it’s best to replace the coil sooner.
Can I use regular water to clean my vape coil?
While water can be used for rinsing, it’s not ideal for cleaning vape coils. Water can leave residue behind, which can lead to clogging and further coil damage. Isopropyl alcohol is the preferred cleaning solution for vape coils as it evaporates quickly and leaves no residue.
What are the best e-liquids for preventing coil burns?
E-liquids with a higher VG (vegetable glycerin) content tend to be thicker and can contribute to coil burning. Opt for e-liquids with a higher PG (propylene glycol) content, as they are thinner and flow more easily through the wicking material.
You can also consider using e-liquids specifically designed for sub-ohm vaping, which often have a lower VG ratio.
What should I do if my vape coil is completely burnt and unusable?
If your vape coil is burnt beyond repair, it’s time to replace it. Make sure to choose a coil compatible with your device and vaping style. Always follow the manufacturer’s s for proper installation and usage.
